18 Common Brisket Cooking Mistakes And How to Avoid Them


 288 Comments


Cooking brisket is one of the most rewarding and frustrating experiences for home cooks. When done right, brisket is tender, juicy, and packed with smoky flavor. But when things go wrong, you're left with dry, tough meat that took hours (or even a full day) to prepare.
If you love cooking brisket or are just getting started, this guide will walk you through 18 common brisket cooking mistakes and, more importantly, how to fix them so you can consistently get great results.
18 Common Mistakes to Cook Brisket And How to Avoid Them
Whether you're smoking your first brisket or you've been chasing that elusive perfect slice for years, I've got you covered. Here are 15 common brisket cooking mistakes and exactly how to avoid them.
Buying the Wrong Grade or Cut of Brisket
Walking into the supermarket and grabbing a small, lean "flat-only" cut or choosing a Select-grade brisket simply because it has a lower price tag severely limits your chances of success. A packer brisket consists of two muscles: the lean flat and the fatty point. Intramuscular marbling, the web of white fat running through the red muscle, renders down into liquid moisture during a long cook.
Select-grade meat lacks this internal reservoir, while buying a flat without the point leaves you with a thin, isolated muscle. Without sufficient marbling, moisture evaporates faster than fat can render, leaving your beef tough, dry, and straw-like regardless of how low and slow you smoke it.
How to Fix It
Buy a full packer brisket, which contains both the flat and the point joined together by a seam of fat. Look for Choice grade at minimum, though Prime or Wagyu is ideal for backyard cooking. When inspecting the brisket in its vacuum seal, look for a thick, uniform flat that does not taper off into a thin sliver at the end, and pick a brisket that is flexible when you bend it in your hands.

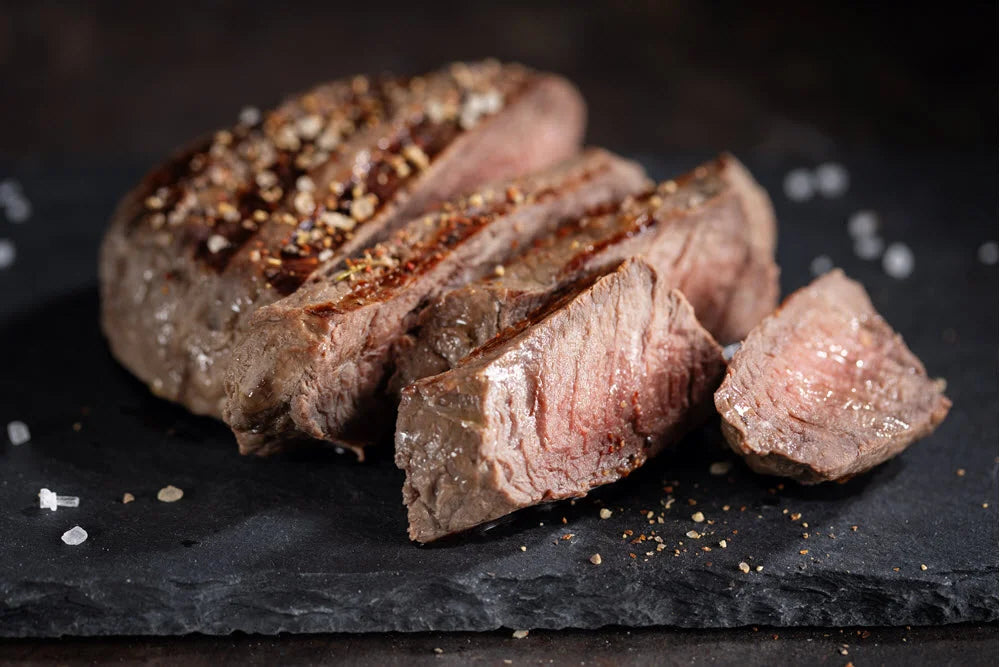
Slicing the Entire Brisket All at Once
Carving up the entire 12-pound brisket into individual slices before placing it on a platter for guests destroys the quality of the remaining meat. Once sliced, hot beef loses heat and surface moisture rapidly. Exposed meat oxidizes within minutes; delicious, tender slices turn cold, dry, and dark brown if left sitting on a platter for 15 to 20 minutes.
How to Fix It
Slice only what you are serving immediately. Keep the rest of the brisket wrapped in its butcher paper on a cutting board inside your insulated cooler. As guests come back for seconds, carve fresh slices on demand to keep every serving warm, moist, and tender.
Slicing with the Grain or Using the Wrong Knife
Slicing parallel to the visible muscle fibers, or using a dull, short chef's knife or fine-toothed bread knife, ruins the mouthfeel of your brisket. Muscle fibers run like long, tough strands of rope. If you cut parallel to these fibers, your teeth have to chew through long muscle strands, making even a soft brisket feel tough and stringy. Sawing back and forth with an improper knife tears the bark off and shreds the delicate flat into unappealing piles of meat.
How to Fix It
Always slice perpendicular (against) the grain to cut those long muscle fibers down into short, easy-to-chew strands. Use a sharp 12-to-14-inch Granton-edge slicing knife that can cut through the entire flat in a single, smooth stroke.
Keep in mind that a packer brisket contains two muscle grain directions:
- The Flat: Muscle fibers run in one straight direction. Slice straight across into pencil-thick slices (roughly 1/4-inch).
- The Point: Muscle fibers run almost perpendicular to the flat. Separate the point from the flat along the natural fat seam, turn the point 90 degrees, and slice thicker slices (roughly 3/8-inch) or cube it into 1-inch squares, toss them in sauce, and return them to the smoker for brisket burnt ends!
Trimming Too Much (or Too Little) Fat
Aggressively scalping the brisket by cutting away all exterior fat down to the bare red meat—or doing the exact opposite by leaving a massive, uneven 2-inch layer of hard fat— ruins both texture and flavor. Fat acts as a thermal shield against the intense, drying heat of the smoker; if you trim too aggressively, the exposed surface of the lean flat will dry out, char, and turn hard long before the interior is tender.
Conversely, leaving too much fat creates a rubbery, greasy barrier that prevents your rub from seasoning the meat, blocks smoke absorption, and stops a crisp bark from forming. Furthermore, hard yellow fat deckles will never render out, no matter how long you cook them.
How to Fix It
Place your brisket on a baking sheet and chill it in the freezer for 20 to 30 minutes before trimming; cold fat cuts cleanly, while warm fat smears. Trim the white fat cap on the bottom down to a smooth, uniform 1/4-inch thickness across the entire surface.
Flip the brisket over and scoop out the hard, dense, yellowish "kernel" or deckle fat located between the flat and the point, this fat will not melt. Finally, trim away any thin, dangling pieces of meat and round off sharp corners to give the brisket an aerodynamic shape so smoke flows smoothly over it.
Throwing an Ice-Cold Brisket Straight onto a Hot Pit
Taking a massive, 15-pound slab of beef straight out of a 35°F refrigerator and setting it immediately onto a preheated grate inside your smoker sets up a severe thermal gradient. Putting an ice-cold piece of thick meat into a hot cooker causes the exterior beef to contract rapidly upon hitting high ambient heat, while the dense thermal mass in the core remains cold. By the time the internal center finally reaches target temperatures, the outer layers have been severely overcooked, squeezed of juices, and dried out.
How to Fix It
After trimming and seasoning your brisket, let it rest on the kitchen counter at room temperature for 45 to 60 minutes before cooking. Allowing the internal core to take the edge off its chill encourages a far more even heat distribution throughout the cook, leading to a smoother, uniform tender finish from edge to center.
Misusing Binders or Over-Complicating the Seasoning Rub
Slathering on a thick layer of yellow mustard, hot sauce, or mayo, followed by a sweet rub loaded with granulated sugar, garlic powder, and fine table salt hinders proper bark formation. Sugar caramelizes and burns at high temperatures over long periods, turning black and bitter during a 12-to-16-hour cook.
Fine table salt dissolves too quickly and easily over-salts the surface, while fine powders turn into a thick, muddy paste when mixed with meat juices, blocking smoke absorption. Furthermore, applying a heavy binder forms a physical wall that insulates the meat from heat and prevents the spices from adhering directly to the beef.
How to Fix It
Embrace the classic Central Texas approach. Use a 1:1 or 2:1 ratio by volume of 16-mesh coarse black pepper to coarse kosher salt (such as Diamond Crystal). Coarse pepper creates surface topography, a rough, micro-textured exterior that catches smoke particles and forms a deep, mahogany bark. If you choose to use a binder like yellow mustard or pickle juice, apply only a few drops and rub it in until it is almost invisible. Its only job is to give the salt and pepper something to cling to.
Seasoning Too Early (or Too Late)
Seasoning your brisket the night before can give it a slightly cured texture and appearance, firmer, drier, and pinker. On lower-grade briskets, this can make the meat come out drier.
How to Fix It:
Season your brisket right before it goes on the smoker, or at most a few hours ahead. This allows the salt to penetrate without over-curing the meat. And remember—never stick your hands back in the rub bowl after you've touched raw meat. That's a food safety disaster waiting to happen.

Rushing Pit Setup and Chasing Temperature Fluctuations
Putting the meat onto the grates before the charcoal or wood fire has settled, or constantly tweaking the air dampers every 10 minutes to maintain an exact target temperature, disrupts the entire smoke process. Early-stage wood fires burn inefficiently, releasing thick, greyish-black creosote smoke (often called "dirty smoke") that coats the meat in a bitter, chemical-tasting film. Additionally, micro-managing air vents causes wild temperature swings—spiking from 200°F to 300°F and back down which tightens muscle fibers and forces out precious internal moisture.
How to Fix It
Light your smoker and let it burn for 30 to 45 minutes until the smoke shifts from thick white clouds to a barely visible, light blue haze (often referred to as "thin blue smoke"). Target a cooking temperature between 225°F and 250°F (107°C–121°C). Once set, leave the vents alone. Minor fluctuations within a 15-degree range are completely normal and will not ruin your cook; stability over time is far more important than reacting to every tiny movement on the dial.
Blindly Orienting the Fat Cap without Considering Heat Direction
Following a blanket rule like "always cook fat cap up" without taking into account how air and radiant heat travel through your specific model of cooker can accidentally burn your meat. Heat in a smoker does not warm meat evenly from all sides; in offset smokers, bullet smokers, and pellet grills, heat usually radiates directly from the deflector plate or firebox below the grate. If you place the lean flat down toward direct radiant heat, it acts as a frying pan, crisping and drying out the bottom before the top even finishes rendering.
How to Fix It
Position the fat cap as a thermal shield toward your heat source:
- Fat Cap Down: Essential for vertical bullet smokers, offset smokers, kettle grills, and pellet smokers where heat rises directly from underneath the cooking grates.
- Fat Cap Up: Best for reverse-flow offset smokers or top-heat cookers where heat and drafts enter from the ceiling of the cooking chamber and roll over the top of the grates.
Panicking During "The Stall" and Cranking Up the Heat
Around 5 to 7 hours into the cook, the internal temperature of the brisket will climb steadily to around 150°F-165°F (65°C-74°C) and then freeze completely for hours. Panicked cooks often assume the fire is dying, prompting them to open the vents or add massive amounts of fuel to force the temp up.
"The Stall" is simply evaporative cooling, moisture migrates from the core to the surface and evaporates, cooling the meat at the exact same rate the smoker heats it. Cranking the pit temperature up to 300°F during this delicate phase shocks the muscle fibers, squeezing out internal moisture and leaving the meat tough and rubbery.
How to Fix It
Understand that the stall is a completely normal phase that can last anywhere from 1 to 4 hours. Stay patient and maintain your steady pit temperature. If you are on a schedule, wait until a firm, dark mahogany bark has established itself on the surface, and then move to the wrapping phase to stop evaporative cooling and push past the stall smoothly.
Wrapping Too Early or Too Late
Wrapping the brisket in paper or foil as soon as it hits a specific temperature (like 150°F) before a bark has formed or waiting until the end of the cook when the exterior is already dry, ruins the meat's texture. Wrapping traps moisture inside to create a steam box that accelerates cooking.
If you wrap too early, before the salt, pepper, rendered fat, and smoke have set into a crust, the trapped steam washes away your seasoning, leaving you with mushy, boiled-looking meat without any bark. If you wrap too late, the exterior absorbs bitter smoke compounds for too long, drying out the outer layer of the flat.
How to Fix It
Never wrap based on internal temperature alone. Wrap based on bark appearance and fat rendering. Look for three distinct visual indicators:
- The exterior has turned a rich, dark mahogany or dark amber color.
- The seasoning rub is set, scratch the surface gently with a finger; if the rub stays on the meat rather than coming off on your finger, it is ready.
- The surface fat has rendered from firm white fat into a soft, sticky, yellowed jelly that yields easily when pressed.
Using Foil When You Want Bark (or Paper When You Need Moisture)
Grabbing heavy-duty aluminum foil without thinking, or assuming peach butcher paper is always the superior choice for every situation, can yield unpredictable bark results. Aluminum foil is completely impermeable and traps 100% of escaping moisture inside.
While this cooks the meat quickly, it essentially braises the brisket, softening and ruining a crunchy, textured bark. Pink butcher paper is porous, it retains enough heat to speed up the cook while letting excess steam escape, but it can struggle to hold in render if you are dealing with a particularly lean Select-grade flat.
How to Fix It
Match your wrapping material to your specific goals:
- Pink/Peach Butcher Paper: Use this when bark development is your primary goal. It keeps heat in to push through the stall while letting steam escape, preserving a crisp, mahogany crust.
- Use this if you are running short on time or dealing with a lean flat that needs extra moisture protection. To prevent a mushy bark in foil, add a splash of beef broth or melted tallow inside the foil fold. Aluminum Foil (The Texas Crutch):
Not Using a Water Pan
Dry brisket often comes from a dry cooking environment. Without adequate moisture in your smoker, the meat surface dries out too quickly, and you lose that precious bark development.
How to Fix It:
Place a water pan in your smoker. It adds moisture to the cooking environment and helps stabilize temperature. A water pan also helps catch drippings, which means less mess and easier cleanup.
Flipping or Moving the Brisket Too Much
Every time you open your smoker, you let out heat and smoke. Every time you flip or move the brisket, you disrupt the cooking process and risk breaking the bark.
How to Fix It:
Leave it alone. Trust your thermometer and your process. If one side of your brisket is taking more heat than the other, you can rotate it once or twice during the cook. But resist the urge to constantly check, flip, or fiddle. Remember: "If you're looking, you ain't cooking."
Cooking by a Fixed Clock Instead of Internal Temperature
Pulling the brisket off the smoker simply because "the recipe said cook for 12 hours" or "cook 1.5 hours per pound" guarantees inconsistent results. No two briskets are identical; two pieces of meat weighing 14 pounds can have completely different fat contents, muscle densities, water retention levels, and surface areas.
Furthermore, wind, outdoor humidity, and minor fire fluctuations change heat transfer rates every single time you cook. Cooking strictly by time yields an undercooked, rubbery mess one weekend and a dry, crumbly mess the next.
How to Fix It
Use time only as a general planning estimate. Always rely on real-time internal temperature monitoring to track progress, and use physical tenderness testing to decide when to stop cooking.
Relying on Built-In Lid Thermometers or Opening the Smoker Lid
Trusting the dome thermometer built into the lid of your smoker, or opening the smoker lid every 20 minutes to check on the meat with a handheld probe, severely disrupts ambient thermal stability. Stock dome thermometers are notoriously inaccurate, they are often off by 25°F to 50°F because they measure air at the top of the lid rather than down at the grate level where your meat sits. Additionally, opening the smoker door lets out heat and humidity, adding 15 to 20 minutes to your total cook time every single time you open the lid while drying out the meat.
How to Fix It
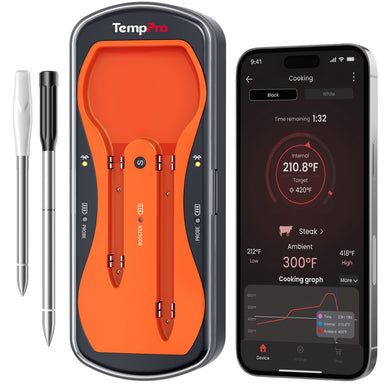
Use a meat thermometer that tracks both ambient grate temperature and internal meat temperature without needing to open the smoker. To avoid continuous temperature issues during a lengthy cook, having a reliable wireless thermometer is essential. The TempPro Twin TempSpike Plus TP972 Smart Wireless Meat Thermometer addresses many of the common tracking problems cooks experience during long smokes.
Key Technical Advantages for Brisket Pitmasters
- Dual Temperature Monitoring – The dual sensors track both the brisket's internal temperature and the smoker/grill ambient temperature, helping you maintain the ideal cooking environment throughout the entire cook.
- 100% Wireless Probe Design – No wires or cables are needed, making it easy to place the probe inside your brisket while monitoring temperatures remotely.
- Long-Range Wireless Connection – Stay connected and check your brisket temperature from a distance without opening the smoker lid and losing heat.
- Smart App Monitoring & Alerts – Receive real-time temperature updates and alerts on your phone, so you know exactly when to wrap, adjust heat, or remove your brisket.
- Designed for Low-and-Slow Cooking – Built for long cooks like brisket, pork shoulder, and ribs, helping you manage hours of smoking with confidence.
- Accurate Internal Temperature Readings – Precise temperature tracking helps prevent undercooked or overcooked brisket and ensures the perfect tender texture.
- Monitor Multiple Cooking Conditions – Track meat temperature and cooking chamber temperature at the same time to identify temperature fluctuations and maintain consistent heat.
- Waterproof & Durable Probe – The rugged probe design withstands long cooking sessions and is easy to clean after grilling or smoking.

By providing real-time tracking of both ambient heat and internal core temperatures, the TempPro Twin TempSpike Plus TP972 takes the guesswork out of smoking brisket.
Using the Wrong Wood or Too Much Smoke
More smoke doesn't mean better flavor. In fact, too much smoke, especially from strong woods like mesquite or hickory, can turn your brisket bitter and overpowering. Thick white smoke leads to bitter bark and an unpleasant aftertaste.
How to Fix It:
Use oak or post oak for authentic Texas-style brisket. For a milder smoke, use apple wood or cherry wood chunks. Aim for thin, blue-tinged smoke, never expose your meat to thick, black smoke. Add wood sparingly during the first half of the cook; there's no need to continue adding wood after five or six hours.
Cutting into the Brisket Immediately Without Resting
Taking the sizzling hot brisket off the pit, placing it onto a cutting board, and carving it into slices right away causes immediate moisture loss. While cooking, intense heat forces internal moisture toward the exterior while building up internal pressure.
If you cut into a boiling-hot brisket immediately, that built-up steam and rendered liquid runs out onto the cutting board in seconds. Your first slice might look moist for a moment, but within 60 seconds, the rest of the flat will turn dry and grey.
How to Fix It
Resting is just as important as cooking. Follow this two-step resting technique:
- The Counter Vent: Place the brisket on the counter at room temperature (wrapped in its paper or foil) for 20 to 30 minutes until internal temps drop to roughly 165°F-170°F (74°C-77°C). This vents excess steam and stops the internal cooking process.
- The Insulated Cooler Rest: Wrap the brisket tightly in warm towels and place it inside a clean, dry insulated cooler (a "faux Cambro") for at least 2 to 4 hours. The insulated environment holds the meat at a safe temperature (above 140°F) while allowing muscle fibers to relax, reabsorbing moisture evenly across the entire flat.
Pre-Slicing Before Storing Leftovers
You've nailed the cook, enjoyed an amazing meal, and now you have leftovers. Don't slice the whole brisket before storing it. Slicing exposes more surface area to cold air, causing the meat to lose moisture and dry out faster.
How to Fix It:
Store leftover brisket in large chunks or whole. Slice only what you're going to eat immediately. When you're ready for leftovers, slice against the grain and reheat gently with a little added moisture (beef broth works great).
Final Thoughts
Cooking brisket is both an art and a science. While mistakes are part of the learning process, understanding these common pitfalls and how to avoid them can dramatically improve your results.
With patience, proper technique, and the right tools like the TempPro Twin TempSpike Plus TP972 wireless meat thermometer, you'll be well on your way to mastering brisket and impressing family and friends with every cook.
Take your time, trust the process, and enjoy the journey because great brisket is always worth the effort.


Comments

Recommended Products